
You need Perch and Perch Studio, both from Steam, both running.
-
Create the package. In Perch Studio choose New package and pick a folder. The folder name becomes the mod id. Studio writes two files:
{ "id": "my-mod", "title": "my-mod", "version": "0.1", "api": 3, "scopes": [], "entry": "main.luau" }--!strict type fields_t = { msg: field_ref_t<string> } local w = widget.new { id = "card", label = "My widget", urgency = urgency.ambient, fields = { msg = field.string("") } } w:place(surface.page, function(f: fields_t): node_t return ui.row { align = ui.align.center, ui.text { text = f.msg, role = ui.role.value }, } end) w:register() perch.on_start:connect(function() w:present { msg = "Hello" } end)Top to bottom:
--!strictturns on the type checker; afields_ttype names the widget’s refs; one widget with a single string field; one display function placed on the page surface; and a handler that presents the widget when the mod starts.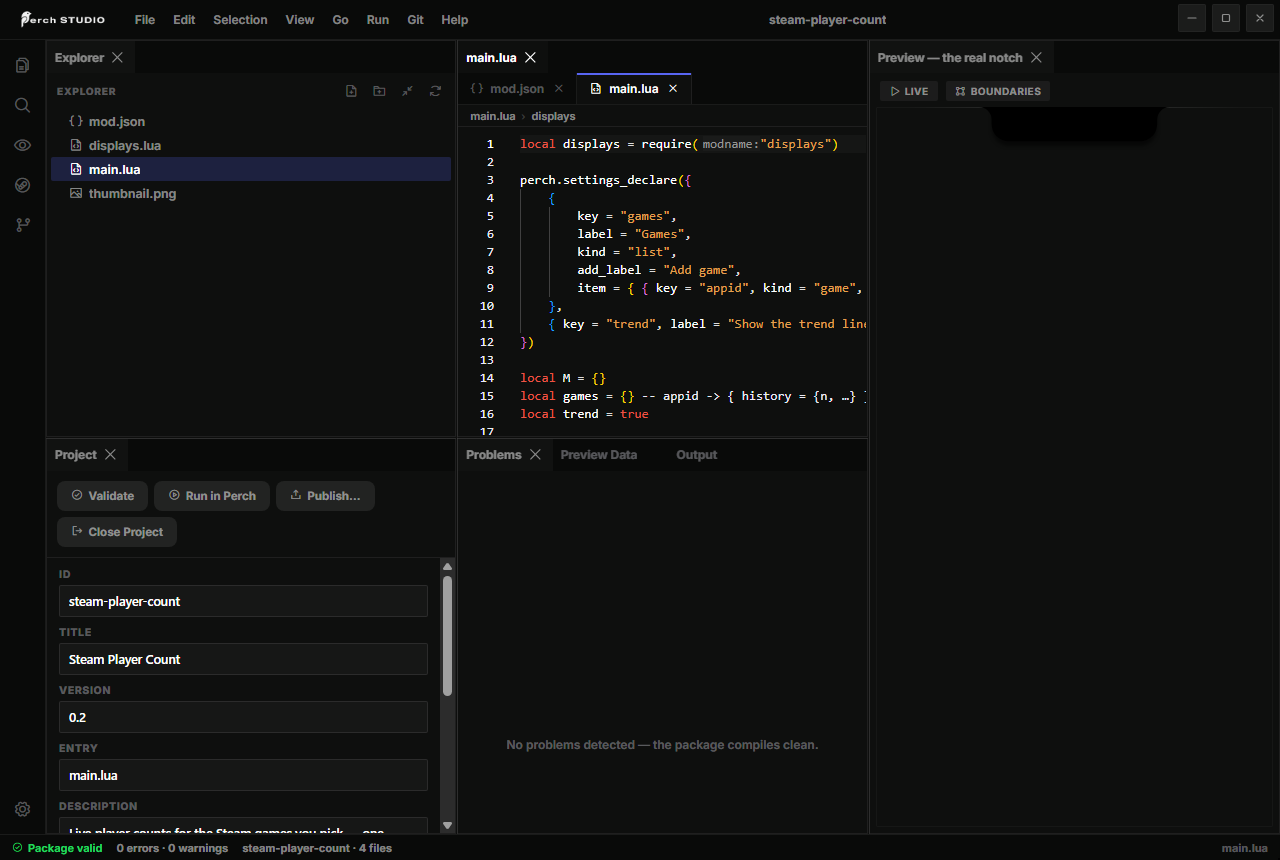
-
Run it. Press Run in Perch. Perch reloads with your package, and a log window opens for your mod: load errors, validation errors with the exact path into your tree, every
perch.logline, every handler failure. Open Settings, Layout, and drag your widget from the gallery onto a page.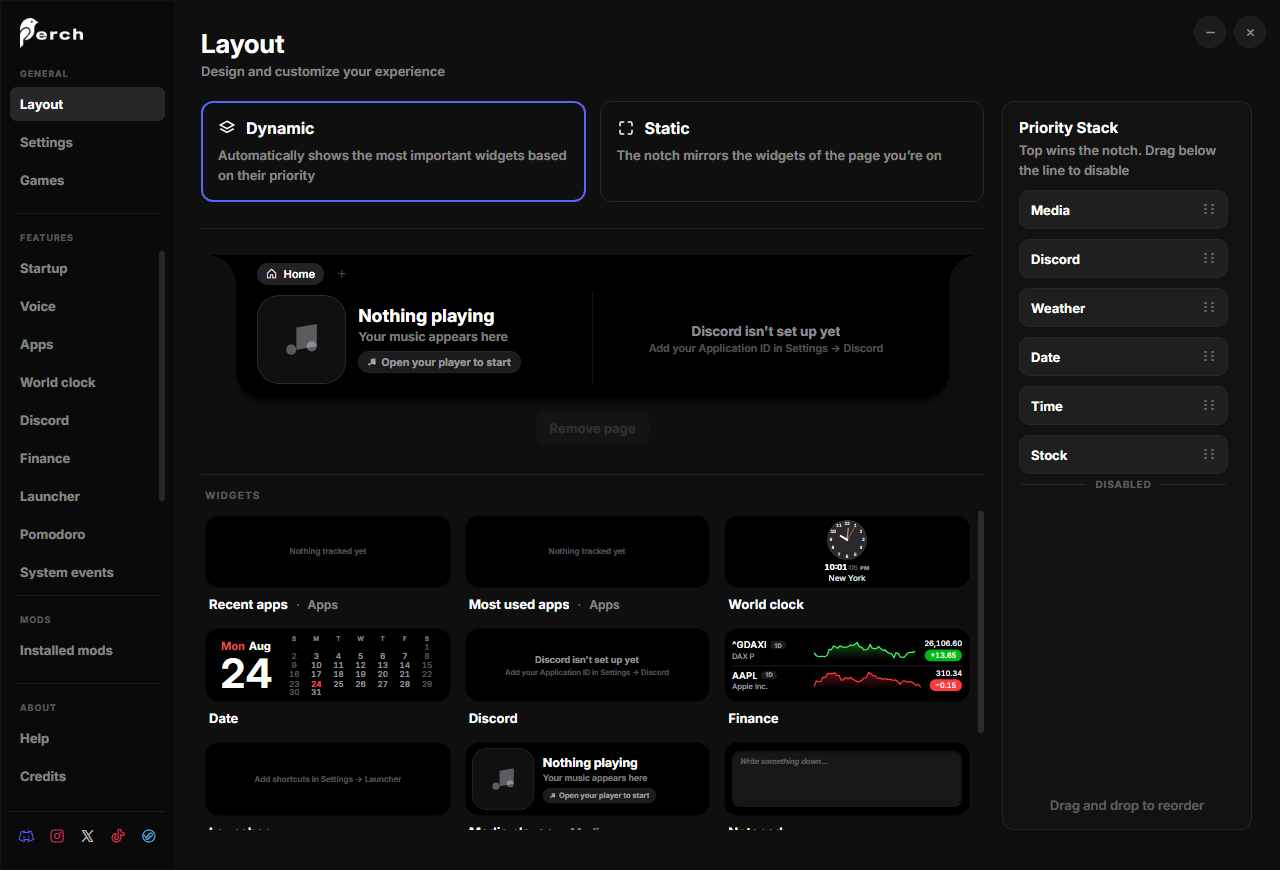
-
Change what it shows. Declare three fields and replace the display:
type fields_t = { title: field_ref_t<string>, sub: field_ref_t<string>, frac: field_ref_t<number> }

local w = widget.new { id = "card", label = "My widget", urgency = urgency.ambient,
  fields = { title = field.string(""), sub = field.string(""), frac = field.number(0) } }

local function card(f: fields_t): node_t
  return ui.row { gap = ui.gap.s, align = ui.align.center, pad = "m",
    ui.icon { glyph = ui.glyph.coffee, set = "duotone", size = ui.size.l, color = ui.color.accent_warm },
    ui.column { gap = ui.gap.xs, flex = 1,
      ui.text { text = f.title, role = ui.role.title },
      ui.text { text = f.sub, role = ui.role.label, color = ui.color.half },
    },
    ui.bar { value = f.frac, height = 5, w = 60, flex = 0, track = ui.color.well, fill = ui.color.accent_warm },
  }
end
w:place(surface.page, card)
Named keys are props, the array part is children, and every data prop takes a ref from
f. Becausefis typed,f.tilteis underlined in Studio before you save. If a box is not where you expected, press Boundaries in the preview to see every node’s outline.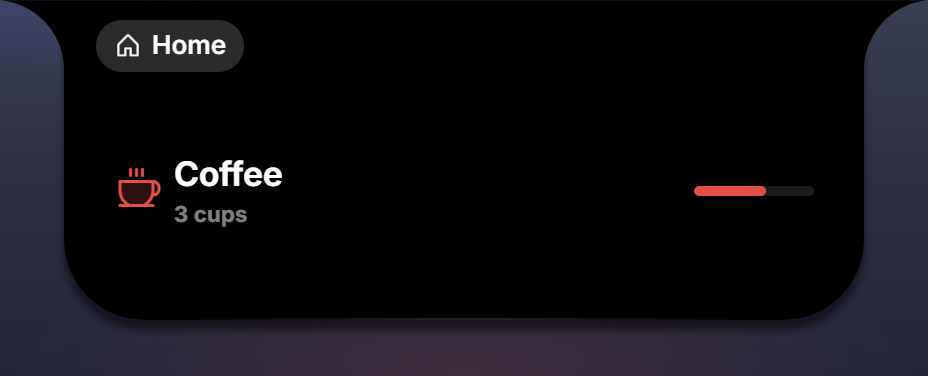
-
Feed it data. Add a timer and connect its signal:
local n: number = 0 local tick = timer.new(5000) tick.on_fire:connect(function() n = (n + 1) % 6 w:push { sub = n .. " cups", frac = n / 5 } end) perch.on_start:connect(function() w:present { title = "Coffee", sub = "0 cups", frac = 0 } tick:start() end)presentmakes the widget appear with its first payload;pushupdates only the fields you pass. Run again and watch the bar climb every five seconds. -
Give it a pill and a tap. Place a second surface for the collapsed notch, and let a tap on the card add a cup:
local function pill(f: fields_t): node_t
  return ui.row { gap = ui.gap.s, align = ui.align.center,
    ui.icon { glyph = ui.glyph.coffee, set = "duotone", size = ui.size.s, color = ui.color.accent_warm },
    ui.text { text = f.sub, role = ui.role.value },
  }
end

local function card(f: fields_t): node_t
  return ui.row { gap = ui.gap.s, align = ui.align.center, pad = "m", hover = ui.hover.soft,
    on_click = function(ctx: input_context_t) n = (n + 1) % 6; w:push { sub = n .. " cups", frac = n / 5 } end,
    -- the icon, the column and the bar from step 3
  }
end

w:place(surface.notch_primary, pill)
w:place(surface.page, card)
w:register()
In dynamic mode the pill drops down when the widget becomes present; its row in the Priority Stack decides who wins the notch when several widgets are present.

-
Add a setting. Above the widget:
perch.settings.declare {
  goal = settings.slider("Daily goal", { min = 1, max = 10, step = 1, default = 5 }),
}
and a handler that reads it:
type settings_t = { goal: number? }
local goal: number = 5

perch.on_configure:connect(function(s: settings_t)
  goal = s.goal or 5
end)
The table key is the setting’s name.
perch.on_configurefires beforeperch.on_startwith the stored values, and again whenever the user changes the row. Your mod now has a page under Settings, Features.
You have used the whole model: a widget with declared fields and surfaces, typed display functions, presence and pushes, an input function, a timer, a setting. When the file grows, move the display functions into displays.luau and require them; A complete mod shows that layout. When you are ready to share, Testing and publishing covers the Workshop.